This is a step by step tutorial showing you how to set up the Chart of Accounts for Ambridge Parish Council shown in the Overview. There are links in the tutorial to the detailed documentation at various points.
Have a look at the tutorial video to see the same information presented.
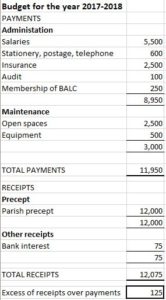
Here is the Ambridge Budget
You can set up the Account Groups and Account Codes in any order but this tutorial shows one way of setting up the Groups and Codes for the Payments. The Receipts are very similar.
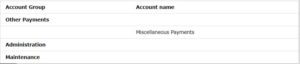
When the software is first installed it is provided with two Account Groups called respectively ‘Other Receipts and ‘Other Payments’. There are two Receipt account codes, called ‘Miscellaneous Receipts’ and ‘VAT repayments’; the latter is a special account and should not be changed. There is just one Payment account code called ‘Miscellaneous Payments’. Here is the Payment accounts layout

The first thing to do is to set up the Account Groups. This is done using Create Payment Account Group under the Setup menu. You can set up all the account groups before you create any additional codes if you wish. or you can set them up one at a time. It doesn’t matter which order you enter them since you can rearrange them later using the facility to edit the layout.
After adding Administration and Maintenance, the layout will look like this
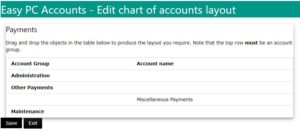
At this point you can rearrange the headings using Edit Payment Accounts layout. This screen has a ‘drag-and-drop’ interface which allows you to move the items into place. For this example, you bring up the page and then place the mouse cursor over Administration, press and hold the left button, and you can drag the heading to the top. Here is what the screen looks like after that operation
You can drag the Maintenance heading in a similar way but for the sake of this tutorial, we’ll now enter the account codes using Create payment account under the Setup menu.
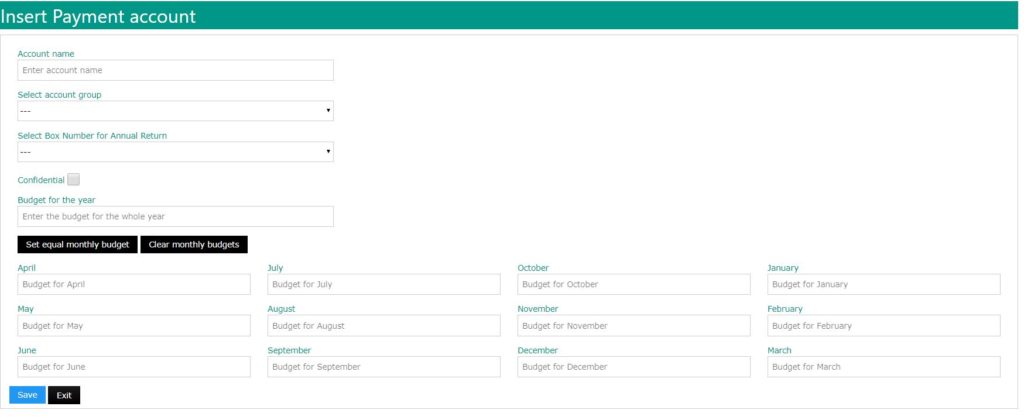
The Account name field allows you to enter the account code of the account you are entering. Account group is a drop-down list of the groups you have set up so far. You need to select the Box Number for the annual return; for Salaries you should select Staff costs. You can also set the information to be Confidential by clicking on the box; this affects how the information is shown on reports.
At this point you might like to save your work (by clicking the Save button) or you can continue by adding the budget information.
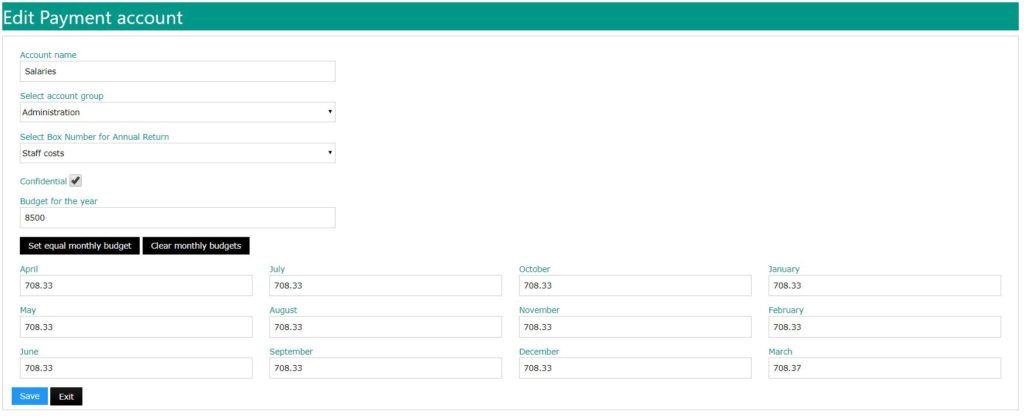
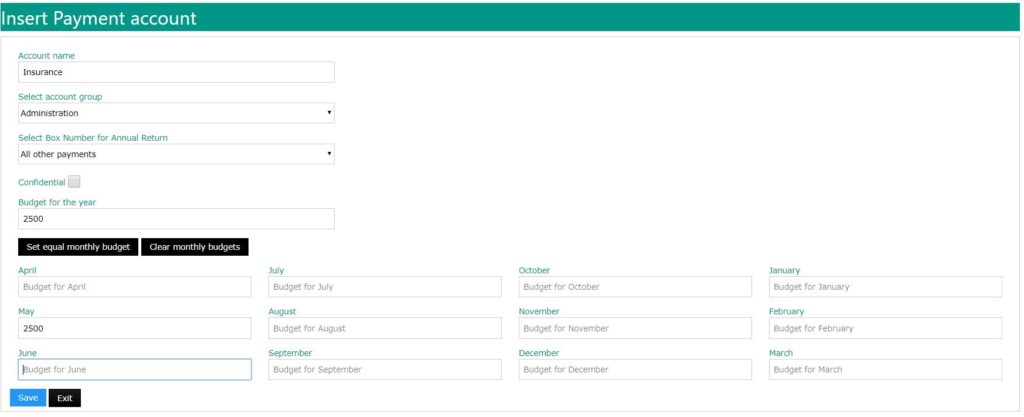
The total budget for the year is £5,500 so enter that in the box with that label. Don’t include a £ sign or comma. You now need to enter the ‘profile’ that you will expect to spend. Because salaries go out monthly, then you just need to click the button labelled Equal monthly budgets and this will automatically fill in the figures for each month. However, some expenditure is more lumpy and, for example, you probably know that the insurance is always paid in May. If that is the case, then, when entering the profile for this, you will enter the full amount in that month. Whatever you choose to do, the total for all the monthly boxes must equal the total budget for the year.
Here is the form fully completed for Salaries
and here is the form completed for Insurance
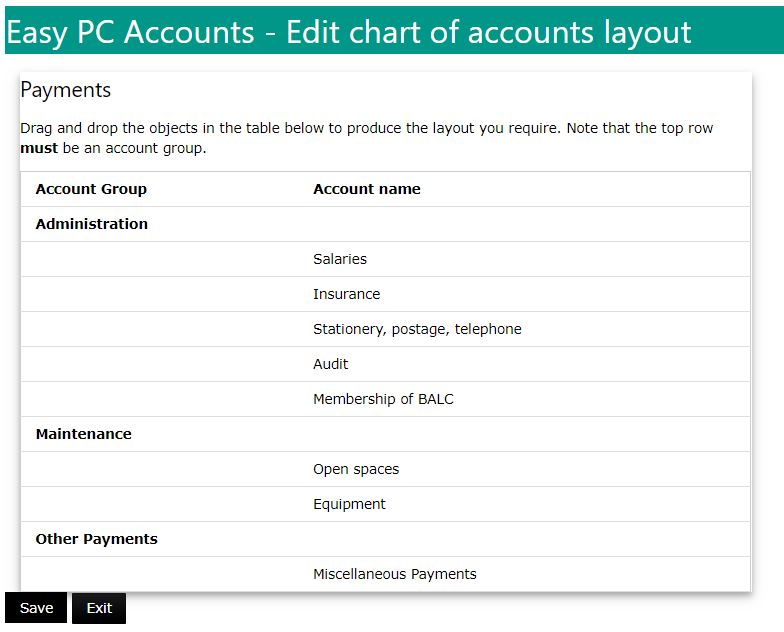
After adding all the account codes you end up with a layout that looks like this:
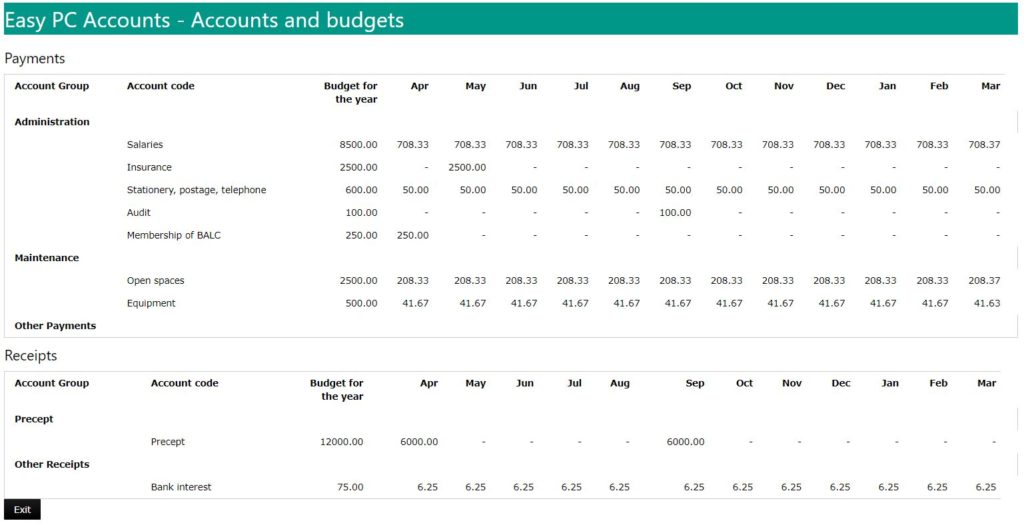
Entering the Receipt accounts is very similar so we shall not go into detail. However, here is the report on Accounts and Budgets accessed through the Reports menu which shows all the Payment and Receipt account codes and account groups together with their respective budgets.